Store any file without storage limit using YouTube and this awesome tool

Yes, You heard it right. This is not click bait. You can actually store any files forever with YouTube and not just video files.
Installation
Infinite Storage Glitch is a tool written in Rust language used for converting any file to video for the purpose of cloud storage. For more info regarding this tool. Go to https://github.com/DvorakDwarf/Infinite-Storage-Glitch
Now let’s begin the installation. This tutorial will contain the steps to install ISG in your local Ubuntu machine.
Steps
- Download ISG into your machine. Click here to download the file.
2. Extract the zip file to home directory
3. Go to Infinite Storage Glitch folder in File Explorer app

4. Now right click and open terminal there
Now run the command to install cargo
sudo apt-get -y install cargoNow run the command given below to build isg
cargo build --releaseNow go to folder target/release

Now open .bashrc file present at home directory in text editor
nano ~/.bashrcIt will look this

Add this line at the end of the file (I have given the path of my file. You need to give yours)
alias isg="/home/kamar/Infinite-Storage-Glitch-master/target/release/isg4real"
Save the file : First press CTRL+X and then press Y and followed by ENTER key
Now type the command given below and press ENTER key
. ~/.bashrcEncoding and Uploading to YouTube
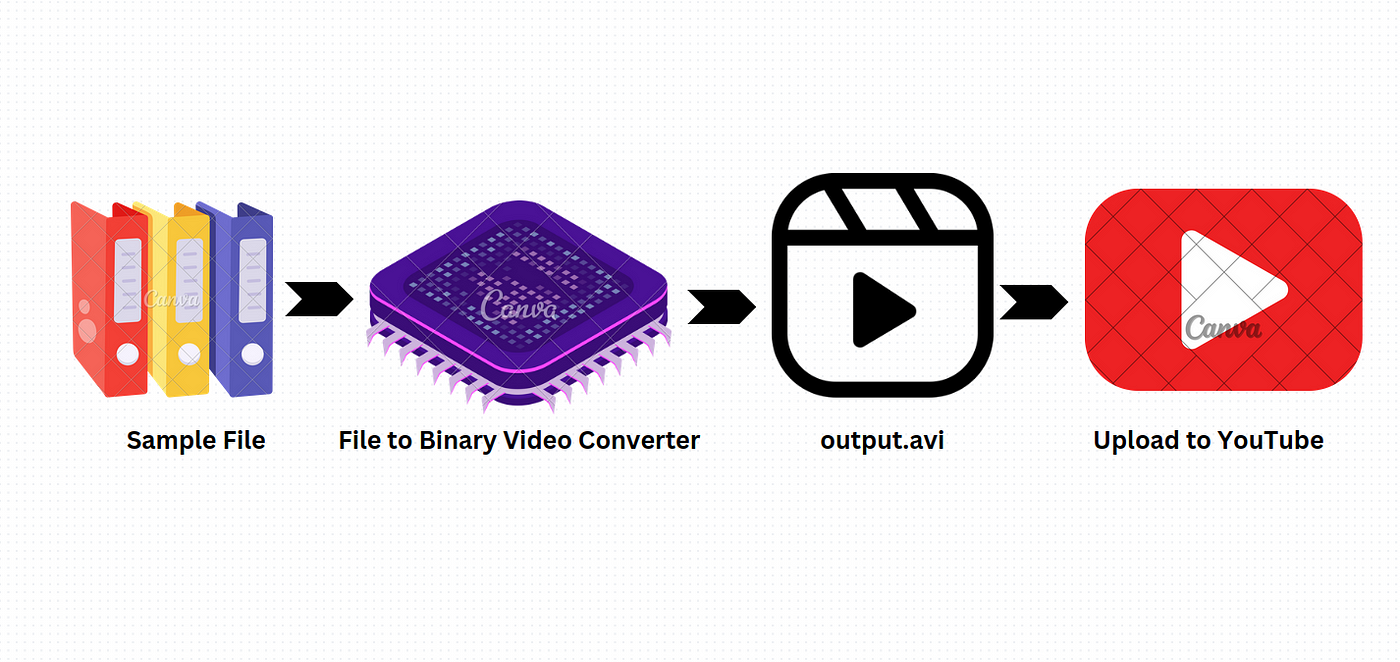
For demo purpose,
We will be taking a small file to encode. The image is given below

Now, the above image is of the size 185.8 kB. Post conversion to video the size will increase ideally to 4x of the original size. If you have multiple files to upload, its better to ZIP the files into single file and then try conversion on top of it.
Lets convert this image to video now. So I have my file present in a directory called isg_test under /home/kamar directory.

First, we have to right click and open terminal here.

To start the app. Type the command given below in terminal and press ENTER key
isg
Now it will ask you to pick a mode. By default, it will be set to EMBED option. So, press ENTER again

Now provide the full path to the image. My path to image is /home/kamar/isg_test/test_image.png

Now Press ENTER key again.

Press ENTER again as Optimal Compression Resistance is selected by default.

In the above Image,
you can clearly see that the processing took like 523 milliseconds and the task is completed. It can take longer time depending on your CPU and size of the file (Mine is Intel i7 7th gen CPU)
Now goto the folder and you will see a new file called output.avi

Now, let me show you the contents of the video.

Now the above video looks like a static TV screen. The reason is that your file contains bits i.e 1s and 0s. The 1s in your file is encoded in white color and 0s in encoded in black color. This is how we store the data present in a file into a video.
I hope you are having a Gmail account.
Without which the steps mentioned below will not work.
Finally its time to upload this video to YouTube.
If you have been a YouTuber or a layman who has uploaded any video to YouTube before, You can skip this section. But, for others I will demonstrate how you can upload a video to YouTube.
- Open browser and goto https://studio.youtube.com/
- On top right corner of the page, click on Create button and then click on Upload videos button

3. Now click on Select Files Button and choose the output.avi file which is present in your folder.

4. Provide a title. In my case, I am giving it as isg_test

5. Now, scroll down and choose the option No,its not made for kids and click Next button

6. Click Next again.

7. Keep clicking Next button. Till you reach the screen given below.

8. Select Unlisted or Private option and click Save button. If you are uploading some sensitive file. Its always better to keep it as private to avoid it being leaked to others.
9. Now, the file is uploaded to YouTube. You can check my upload at https://www.youtube.com/watch?v=4a7e28nK5Mg
Now, How do I get my data back?
- Download the YouTube Video to your machine
Open terminal and run isg.
isg
Press down arrow key button and choose Download option and press ENTER key

Like this

Now press ENTER key again and you get this

Now the file is downloaded to a path like given above.
2. Run isg again
isg
This time choose Dislodge option (Press down arrow key twice and press ENTER)

Now paste the path of the downloaded video like this

Now press ENTER key

provide the name and the extension of the filename as given above and press ENTER key

Now go to the output directory and find the file back in its original form

If you find any difficulty in following the steps. Contact me in comment section. I will reply to your queries 😊
Thanks for reading.